Difference between revisions of "Collection Manager"
| Line 95: | Line 95: | ||
A Statement Batch can be set as "deleted" by setting the "deleted" option to "Yes" and selecting [Save].<br> | A Statement Batch can be set as "deleted" by setting the "deleted" option to "Yes" and selecting [Save].<br> | ||
| − | '''Note: Deleting a Statement Batch will also delete all Statement History and Filing History created by the <br> | + | '''Note: Deleting a Statement Batch will also delete all Statement History and Filing History created by the '''<br> |
| − | Batch this has been deleted.'''<br> | + | '''Batch this has been deleted.'''<br> |
Revision as of 17:54, 7 October 2014
Collection Manager User Guide
Introduction
The Collection Manager provides the ability to gather Statements, to create Statements and to re-run Statements.
One important new feature in the Collection Manager is that all Statements are gathered into batches,
created into a a PDF printable format or electronic file, and if the user chooses, the option is available to add a
newly gathered batch to an existing batch.
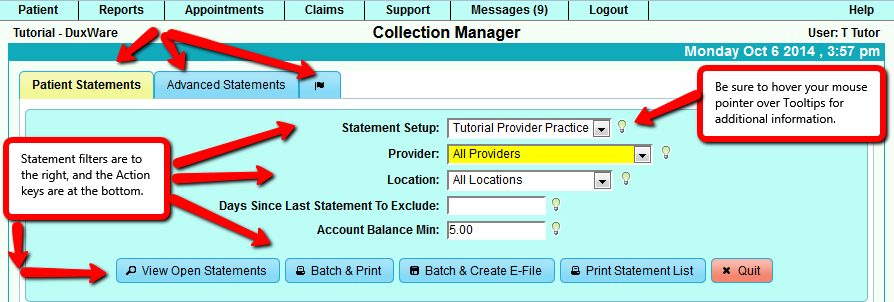
Upon entry into the Collection Manager, There are three tabs at the top left of the screen:
- Patient Statements for basic statement gathering
- Advanced Statements for more versatile manipulation of statement gathering
- Flag Tab to open previous batches
Terminology
- Statement - A collection of one or more claims
- Statement Run - the process of creating one or more statements based on a Statement Batch
- Statement Batch - A group of statements created through the use of the Statement Filters
- Statement Filters - The method by which claims are gathered together so they can be placed into Statement Batches
Section One - Statement Default Setup
Statement Setup provides a set of default options for all patient statements. These options control what information
is shown on printable statements and how to format it. Refer to the Statement Setup for details.
Section Two - Basic Statement Gathering and Creation
1. Accessing the Collection Manager and initial viewing.
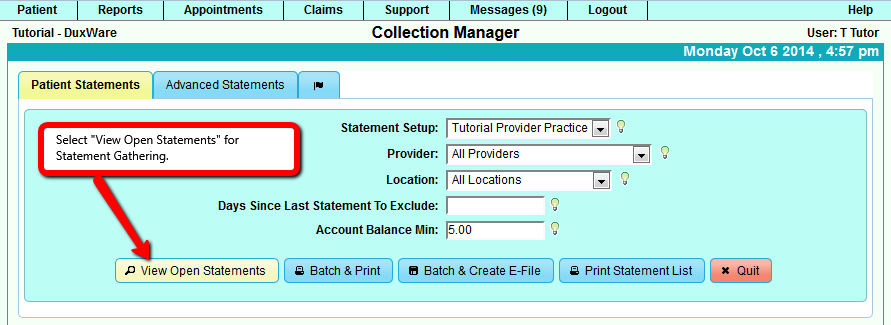
2. Gathering Statements
Statements can be gathered by selecting "View Open Statements" button. The result will be filtered by filtered options that
listed in the Action buttons.
NOTE: All of the other filter options associated with a Statement Setup, but not displayed here, also affect the Statement
gathering result. For example, if the Statement Setup has the Payer type set to "Medicare", the gathering will only be looking for
claims that are currently on file to Medicare.
3. Creating A Statement Batch
3.1 Select Statements that need to be included in a Batch
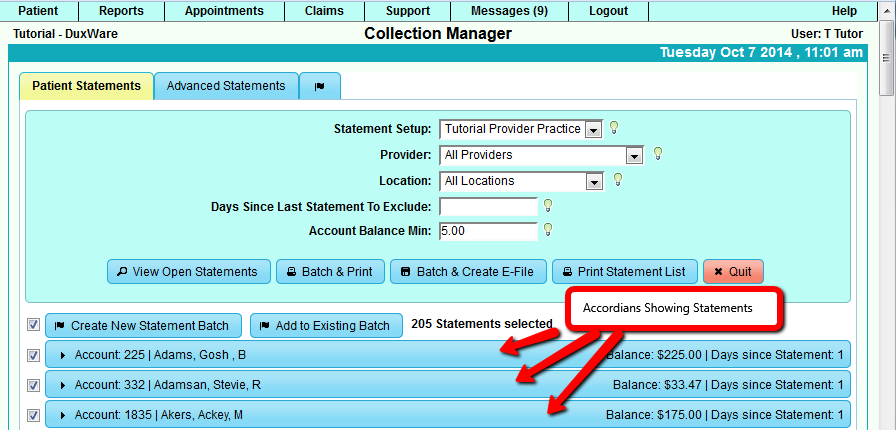
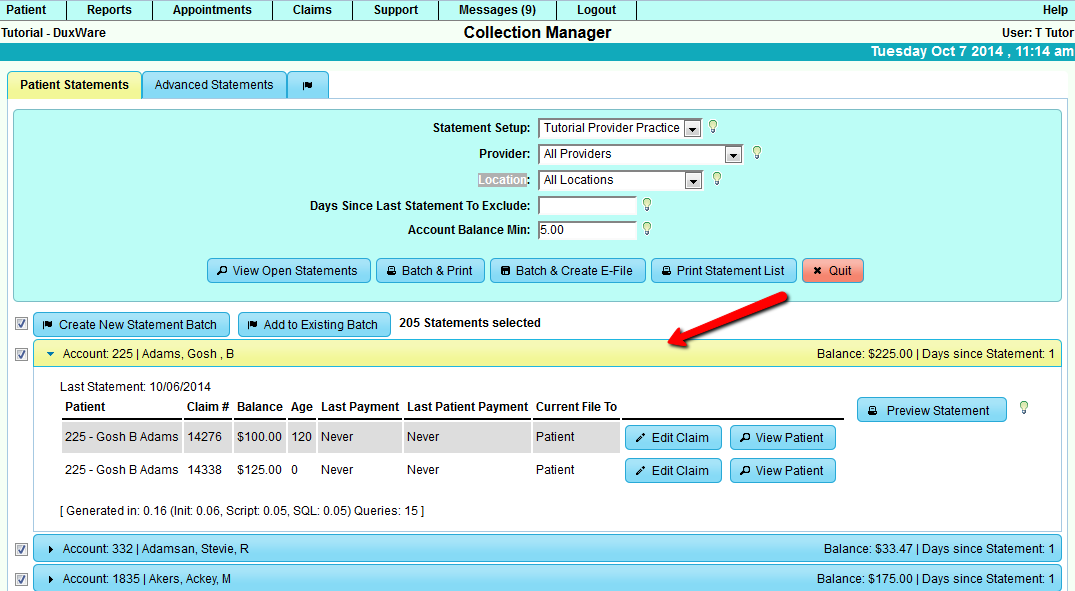
If the gathering process finds any Statements, they will be displayed in the "accordions" which can be in expanded view or
collapsed view showing the summary of Statements.
Select an Accordion to view Statement Summary, Edit a claim, View Patient, or Preview a Statement. You can Preview a Statement
without adding the preview and print to Statement History.
3.2 Add selected statements to a Batch
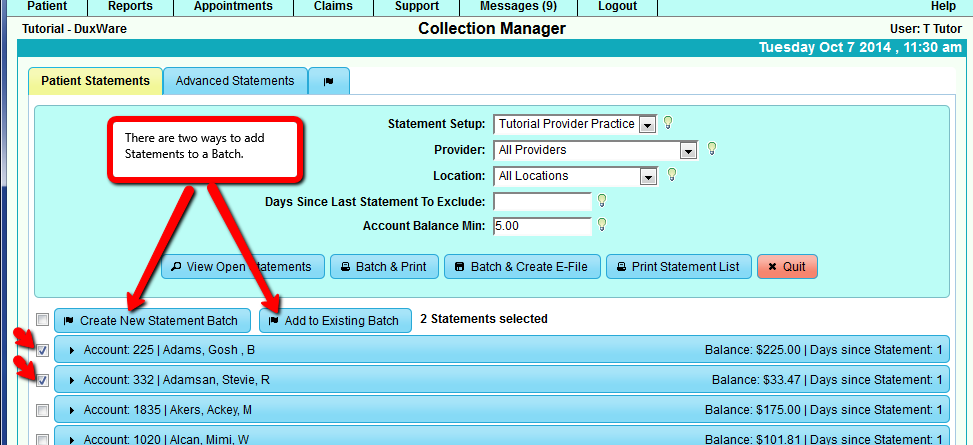
There are two ways to add Statement to Batches:
- Create a New Statement Batch
- Add to Existing Batch
3.3 Choose Statement Batch actions at the time of creating the Batch.
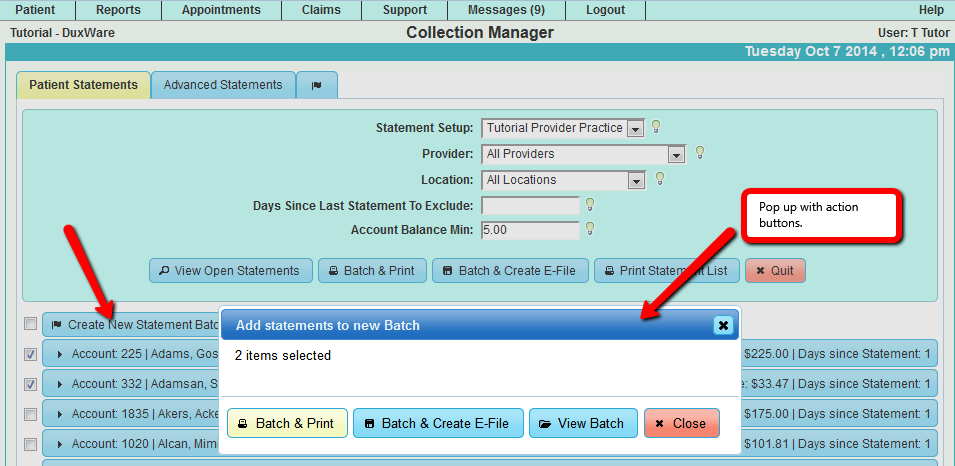
At the time of creating a Statement Batch or adding Statements to an existing Batch, a dialog pops up to ask what is the desired
action after the Batch is created.
View Batch - opens a new tab and shows all Statements in that Batch.
Print Statement Batch - opens a new tab and show all Statements in that Batch and create PDF Statements, also creates
Statement History and Filing History.
Create Electronic File Batch - opens a new tab and shows all Statements in that Batch and creates an Electronic Statement File
with a prompt for the user to Download the file. This action also creates statement and filing history in the respective accounts.
3.4 Creating Statement in View Batch
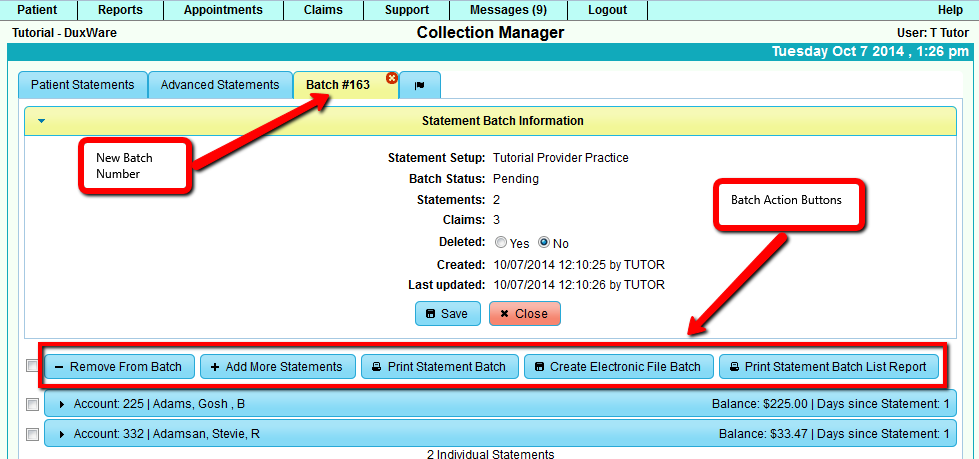
In addition to the same action buttons described in 3.3, more action buttons are available in the Batch tab view.
Remove From Batch - remove selected Statements from the current Batch. Note: when a Statement Batch has been run,
this button will no longer be available.
Add More Statements - a prompt to open the Advanced Statements tab to gather more statements and add to the current Batch.
Note: when a Statement Batch has been run , this button will no longer be available.
Print Statement Batch - creates PDF to print statements in the batch.
Create electronic file Batch- creates electronic statement file.
Print Statement List Report - Creates a PDF report listing a summary of each account with aging.
3.5 Delete a Statement Batch
A Statement Batch can be set as "deleted" by setting the "deleted" option to "Yes" and selecting [Save].
Note: Deleting a Statement Batch will also delete all Statement History and Filing History created by the
Batch this has been deleted.
