DuxWare Release Note - 12/10/2017
Reports
Claim Summary Report (NEW)
To access this report: Reports>Listing>Claim Summary report.
This report will list service details by entry date or service date as well as patient and insurance payments. Contents of the report: Provider, Location, Claim #, Service line, Service Date, Procedure, Units, Patient Account #, Patient Name, Last Payment Date, Charges, Total Payments, Patient Payments, Total Adjustments.
The report will export to PDF and you can also export to CSV to open and manipulate your data in EXCEL.
Claim Write-off Report (NEW)
To access this report: Reports>Revenue Analysis>Claim Write-off Report
The Claim Write Off Report displays either full claim write offs or individual service write offs. A full write off is a claim that has been credited the same amount as the claim's total service charges, where an individual service write off is a single service on a claim that has been credited the same amount as the service charge. The Show Full Claim Write offs Only option controls how the claims are displayed - select Yes to show full write offs only, or select No to show individual service write offs.
Patients by Diagnosis
To access this report: Reports>Patient>Patients by Diagnosis.
Report Diagnosis Group Match Modes:
Match Any Position - Match any of diagnosis codes 1-12 with any other diagnosis.
Single Diagnosis - Match diagnosis code 1 where all other diagnosis codes are blank.
Match Diagnosis Code Only: Match diagnosis codes in a given position where all other codes can be anything.
Note: To add a Report Diagnosis Group, go to Support>Procedures/Diagnosis>Report Diagnosis Group Setup.
Letters
There are new formatting options available system generated letters.
To access Letters menu, go to Reports>Letters. You will find the Recall Manager, Referring Provider and Patient Dunning Letters.
There are five options for Letterhead:
- None - the practice uses their own pre-printed letterhead
- Internal - will produce a letterhead that is aligned center (location name, address 1 & 2, city, state, zip code, & date).
- Minimal - will produce a letterhead that is aligned center (system date only)
- Practice - will produce a letterhead that is aligned center (location practice name, address 1 & 2, city, state, zip code)
- Provider - will produce a letterhead that is aligned center (provider name, address 1 & 2, city, state, zip code, location phone number, system date)
The above formats are editable by the user to fit their specific needs.
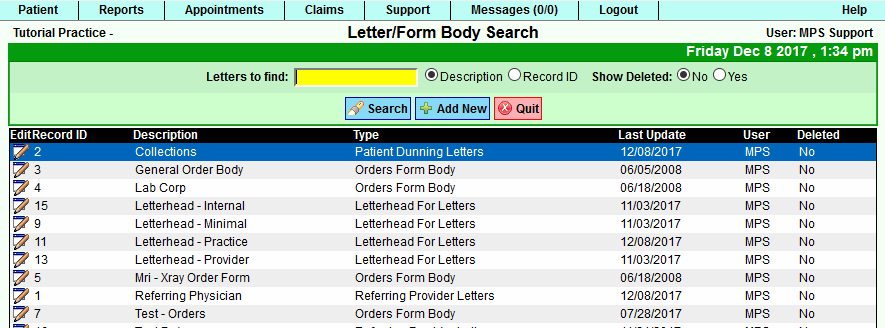
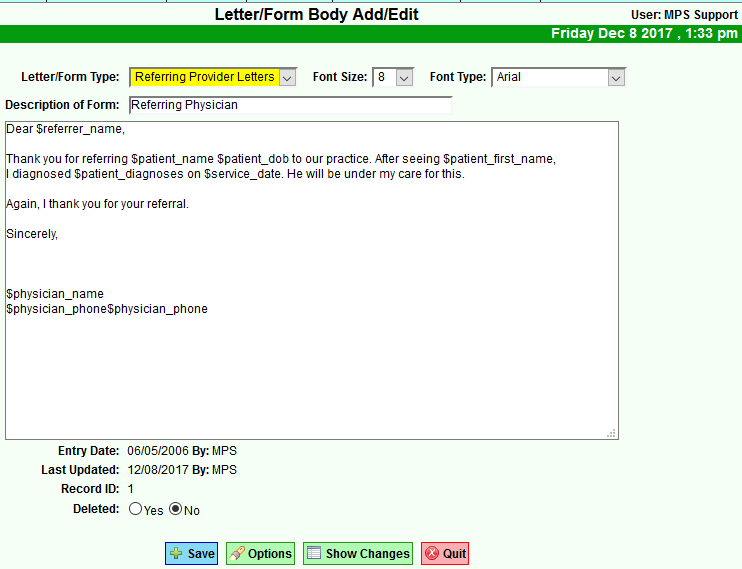
To access Letter/Form Body Add/Edit, go to Support>General>Letter/Form Body Setup.
Once you have accessed the Letter/Form Body Search, you can select and existing letter, form, letterhead template, or add a new one.
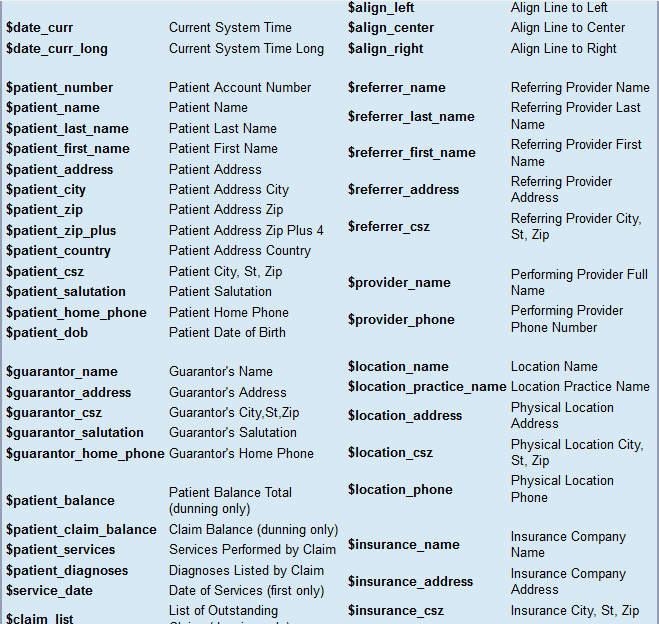
Once you have selected a letter or form to edit, you can select the [options] button at the bottom to see the available fields that you can insert into your form.
Below is a current list of fields that are available to insert into your letter/form. To add to your letter/form, you simply select the field that you want and close the box.
Payments
Pre-payments/Unapplied Payments
We now have configurable options to force a selection of the following items in Pre-payment Add:
- Provider
- Location
- Pay code
Currently, the system will auto-select the provider and/or location codes based on appointment, demographic default, or last service. The pay code is which ever code is listed first in your payment/adjustment code table. If you have a busy practice with multiple providers and locations, you may want to consider forcing the user to make a selection at the time of service to reduce errors. If you would like this option enabled, please contact your PM Support Team, and we will be glad to accommodate your request.


