Claim Manager
Contents
DuxWare Claim Manager
The DuxWare Claim Manager is where pending claims reside to be submitted to the respective payers either via Electronic or Paper submission.
The user may also:
- Retrieve and view previously submitted batches
- Mark previously filed batches back to pending
- Submit claims by provider, location, etc.
- Review claims pending by payer, held by payer, pending by batch, or held by batch
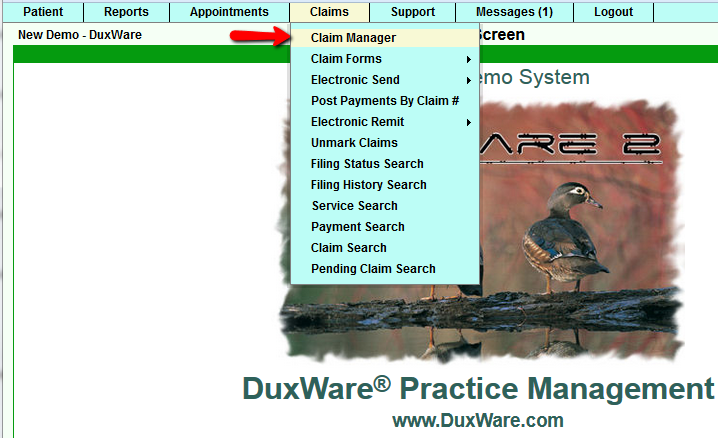
To access the Claim Manager, select Claim Manager from the Claims tab as illustrated below:
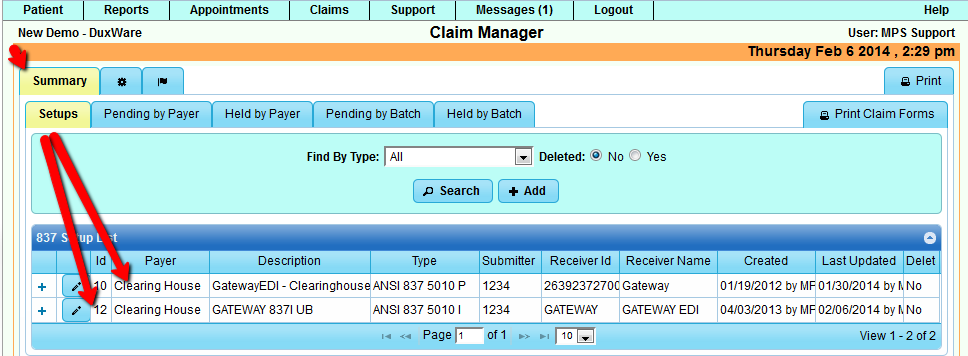
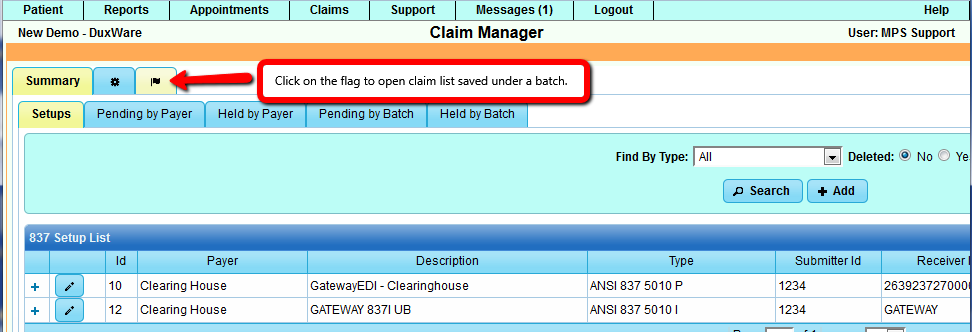
Once you have selected Claim Manager, you will land in the Claim Manager with the Summary Tab highlighted in yellow as illustrated below:
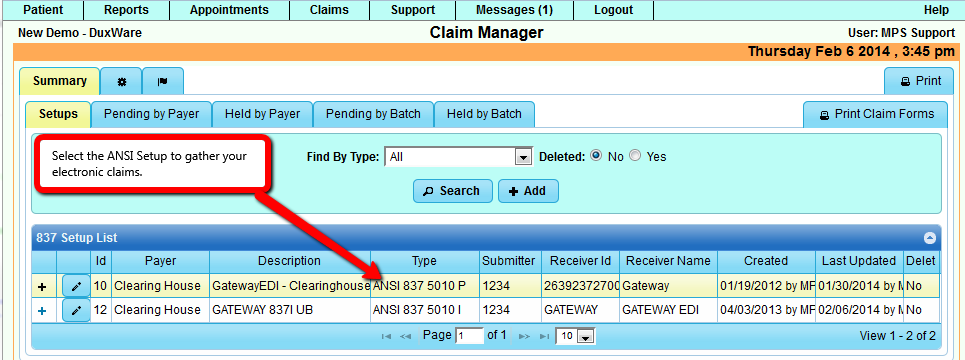
At this point, you have the option to select the appropriate 837 Setup to gather your electronic claims, print Claim Forms, or review claims that are:
- Pending by Payer
- Held by Payer
- Pending by Batch
- Held by Batch
- Select the Flag to the right of the Summary Tab to retrieve previous batches
We do ask that you call into our Customer Support Department to assist with configuring the ANSI Setups for your clearinghouse.
Gathering and Submitting Claims Electronically
Access the Claim Manager as illustrated above.
Select the appropriate 837 Setup. For this example, we will choose ANSI 837 5010P. This type setup is used for Professional claims such as would be
billed from a physician's office.
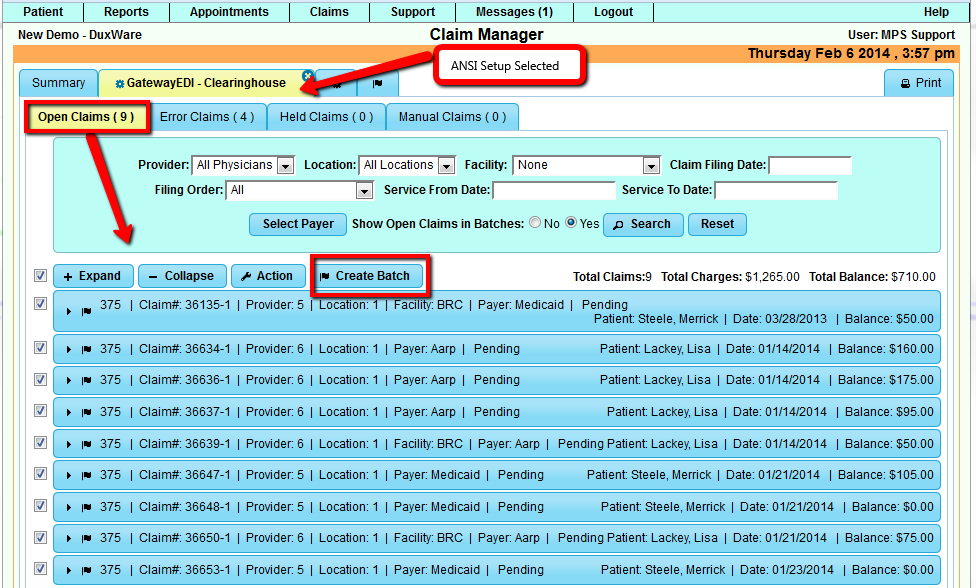
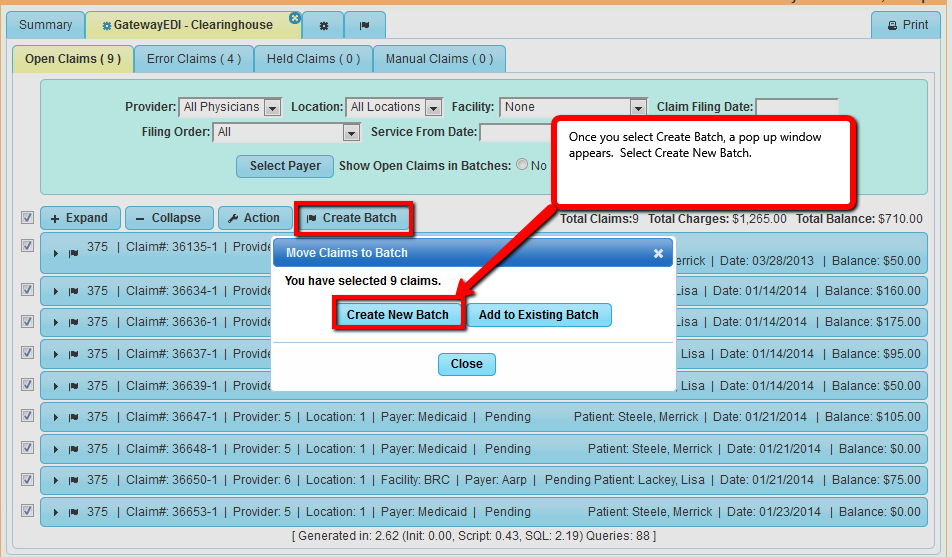
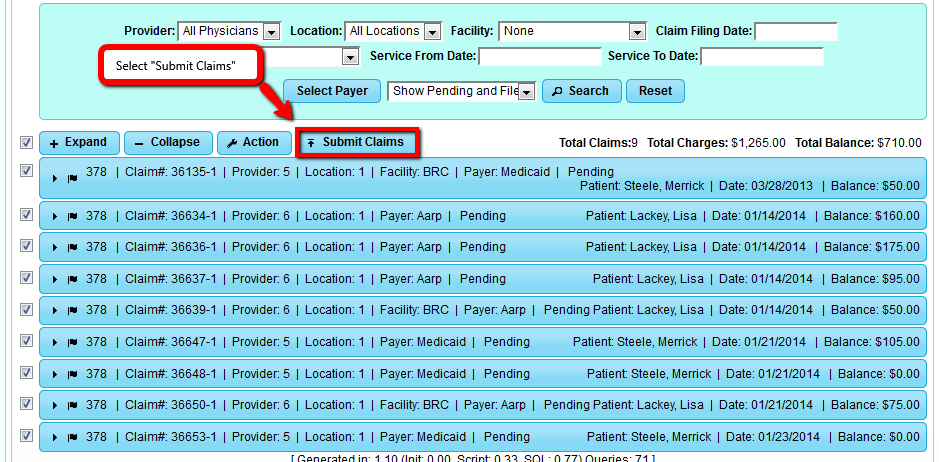
Once the 837 ANSI Setup is selected, you will land at the following screen, and a list of your open claims will populate the screen as illustrated below.
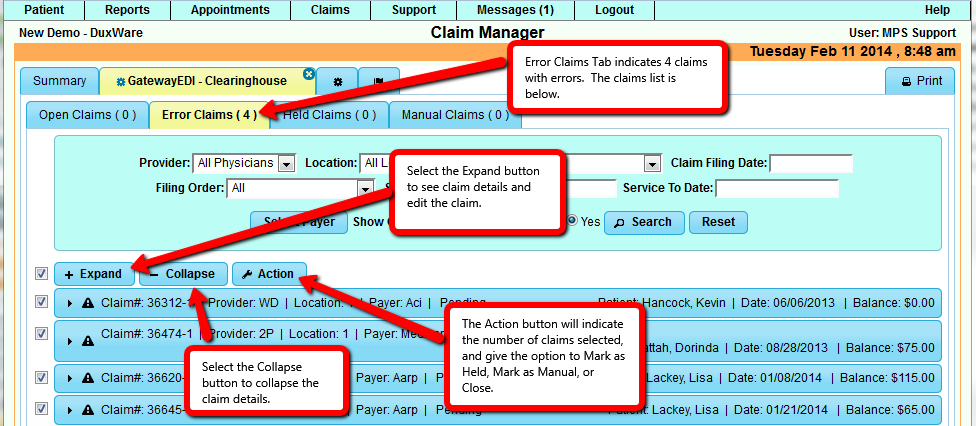
If you would like to see claim details, select the Expand button. Select Collapse button to collapse the claims. The Action button will give the options to:
- Create Batch
- Mark as Held
- Mark as Manual
- Close the Action window
In our example, there are 4 claims under the Error Claims tab that were separated from the open claims. You have the option to view the Error claims and resolve errors before you submit claims to the clearinghouse, or you can submit the Open claims now and correct the errors at a later time. As you resolve errors on claims, they will automatically move to under the Open Claims tab once you regather your claims under the ANSI setup.
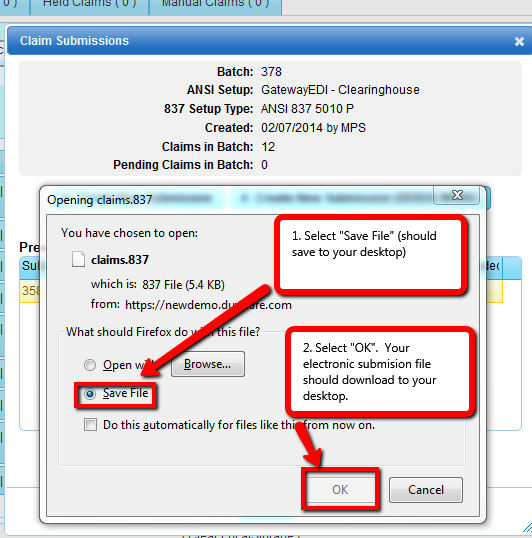
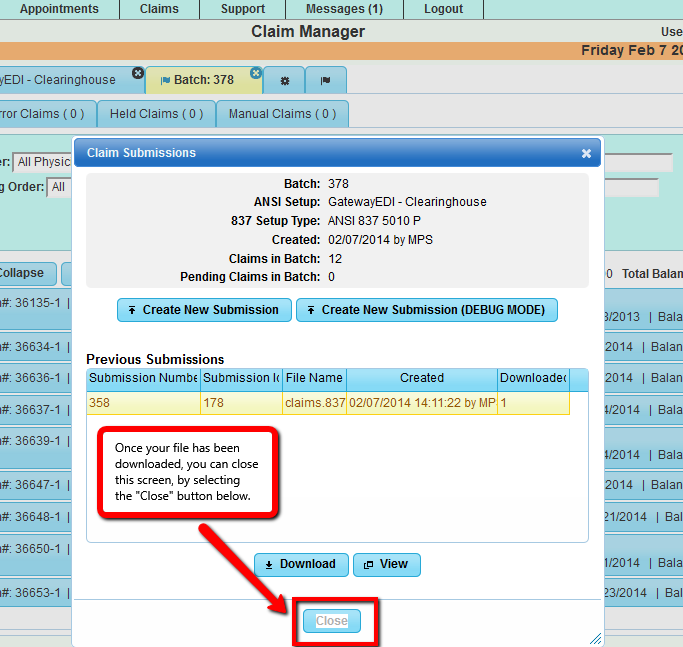
You should see a file on your desktop similar to the claims.837 file illustrated above. If you don't find the claims.837 or claims.txt on your desktop,
check your downloads in your Firefox web browser. If downloads are not configured to download to your desktop, you can go to the Firefox menu, select
Tools/Options/General/Save files to Desktop. You will need to browse and pick your desktop.
You are now ready to log into your clearinghouse and upload your claims file. Your claim submission file will either have a file extension of .837 or .txt.
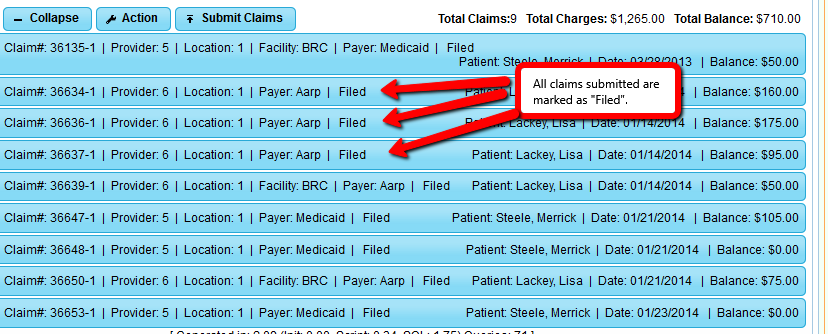
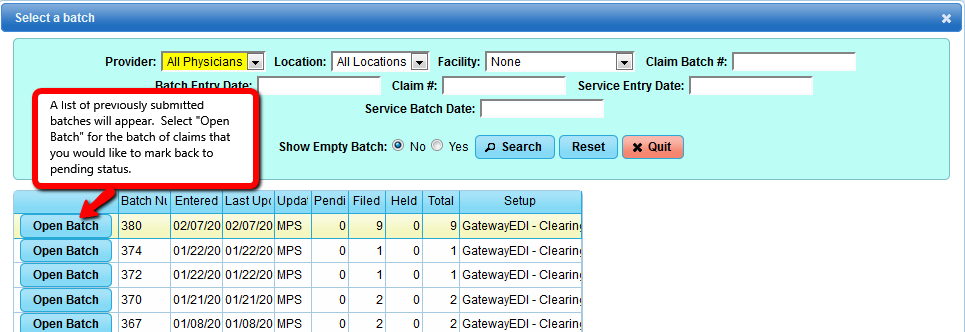
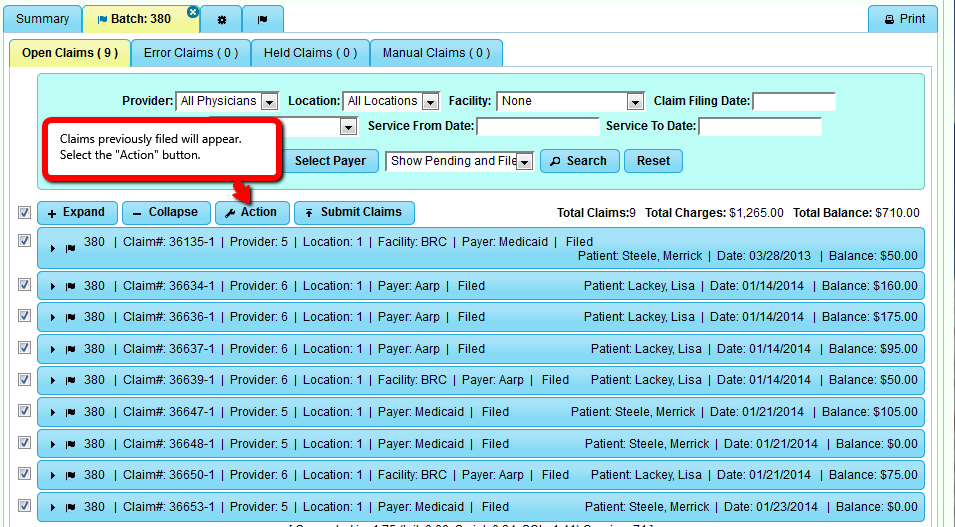
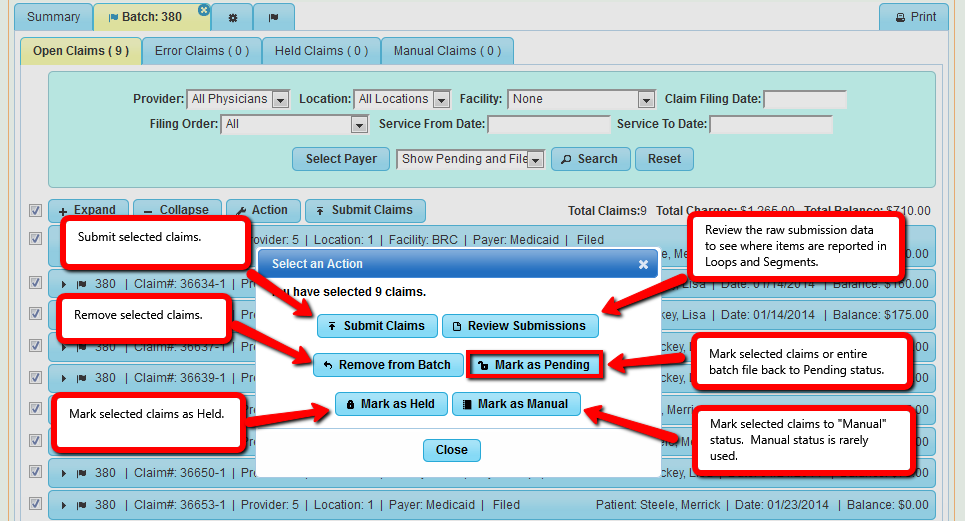
Mark Claims Back to Pending or Take other Actions with a Submission File
For instance, you may have submitted a test file to your respective clearinghouse. The clearinghouse may ask you to resubmit your submission file
in a new submission file. To accomplish that task, you would need to be able to Mark your previous submission back to Pending status.
Below are illustrations to help you through the process.
Once you have completed the process of Marking your claims back to Pending status, you can regather them by going back through the claims setup in your
Claim Manager. This will ensure that you capture all corrections that you may have made to claims that you will resubmit to the clearinghouse.
Resolving Error Claims in the Claim Manager
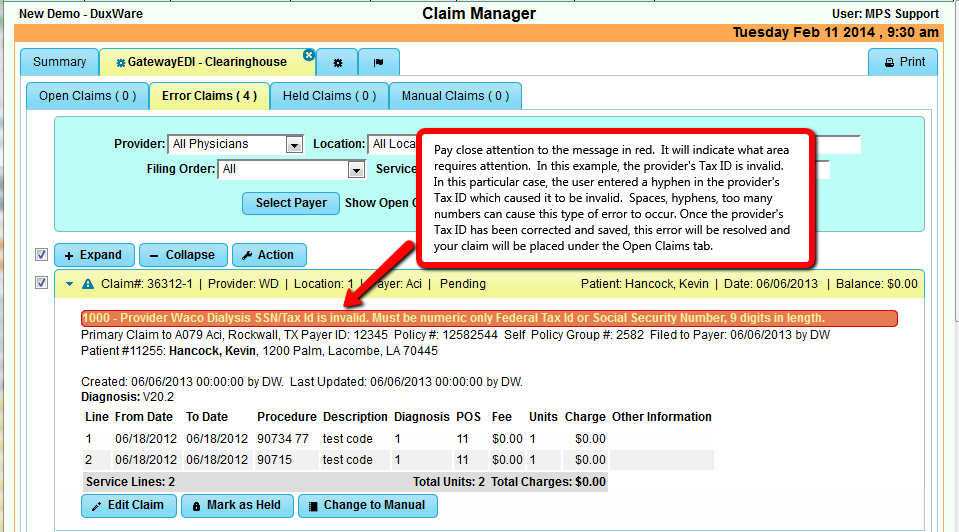
If you have any claims that have errors, they will be in the Error Claims Tab of your Claim Manager.
Select the Error Claims to view the claims with Errors.
Select Expand button to see the error(s) in the red bar at the top of the claim.
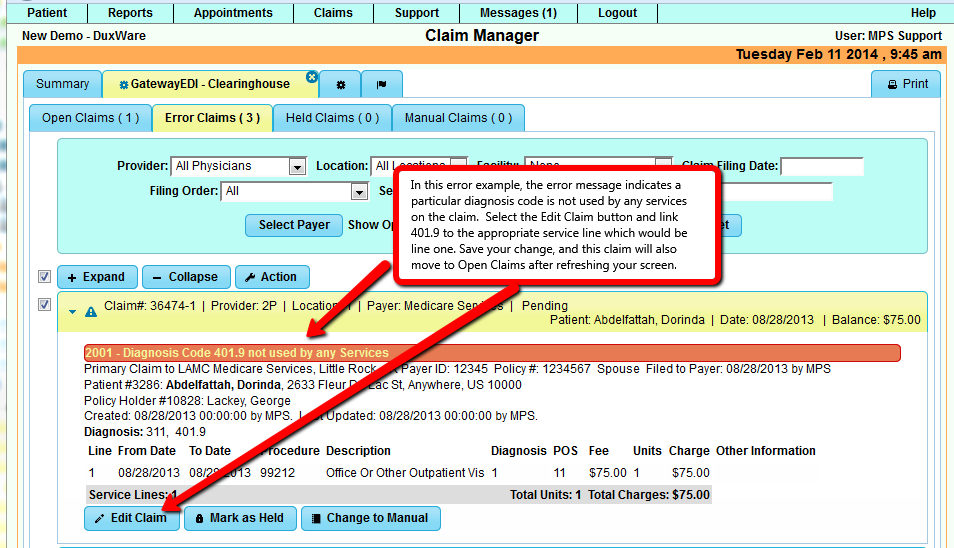
As you resolve your errors, they will be moved to the Open Claims tab upon refreshing your screen.
You can select Edit Claim to make changes without leaving the Claim Manager.
As you can see in the illustration below, there are three errors instead of four.
Held Claims
Claims that have been placed on hold. There are a number of reasons that you may place a claim on hold.
- pending additional information from the provider
- holding claims until the provider receives approval to submit claims from a particular payer
- the biller needs to verify services are correct
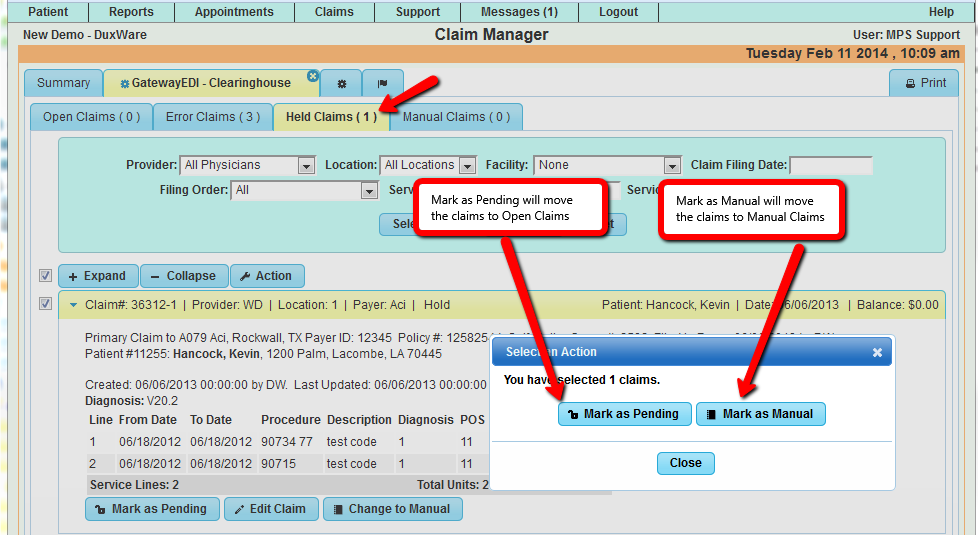
Once the reason for placing the claim on Hold has been satisfied, you can select the Held Claims Tab in the Claim Manager.
Select the claims that you wish to remove from hold status. You have the options to:
- Expand all claims, or select and individual claim to Expand to get details
- Collapse Claims
- Action (Will give you the number of claims selected to either Mark as Pending, Mark as Manual, or Close
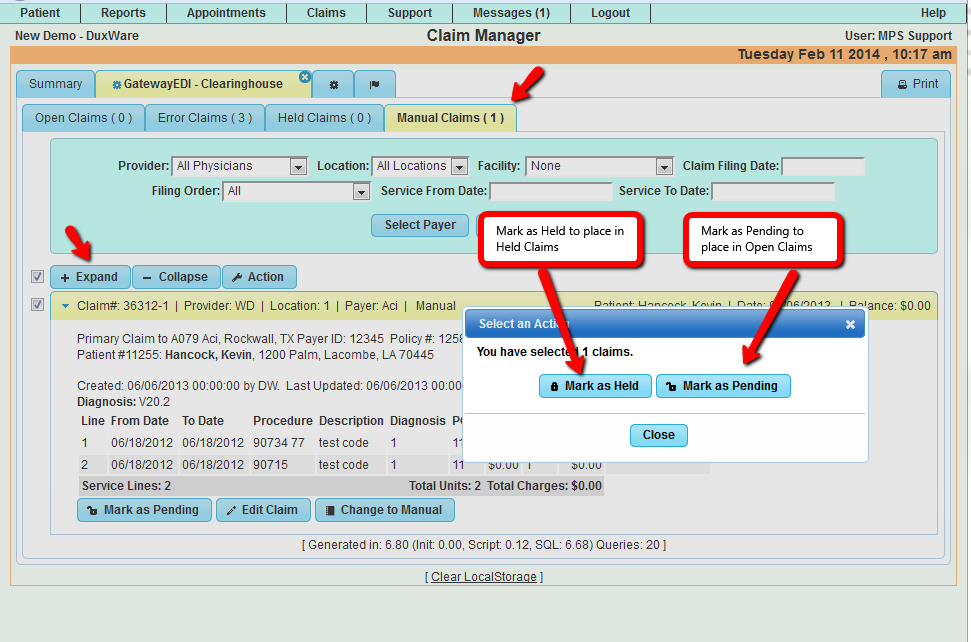
Manual Claims
Claims that you are not sending electronically – or at all.
Print Claim Forms
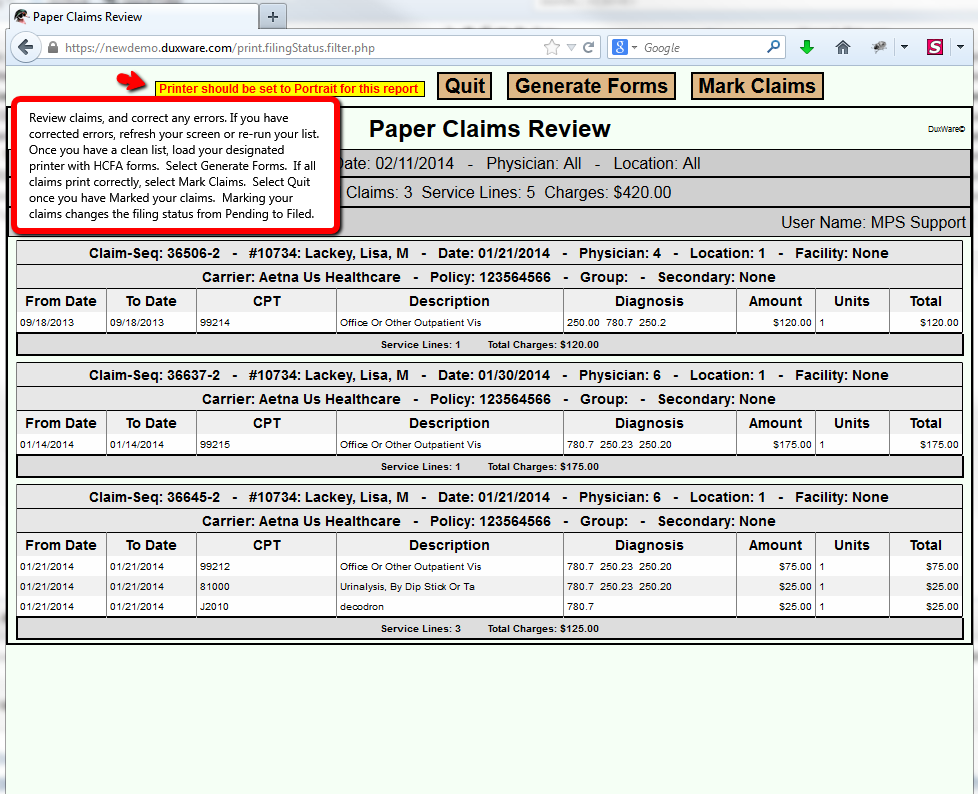
For claims that will not be submitted electronically, you will need to Print Claim Forms.
In the Payer Setup located under the Support Tab, you selected "No" to submit claims electronically.
If you obtain a Payer ID from your clearinghouse, you can enter it in the Claims Payer ID field of the Payer Setup,
and change the option to "Yes" to Submit Claims Electronically. When you regather claims in the Claim Manager, the claims previously
sent to Paper will not gather under Electronics.
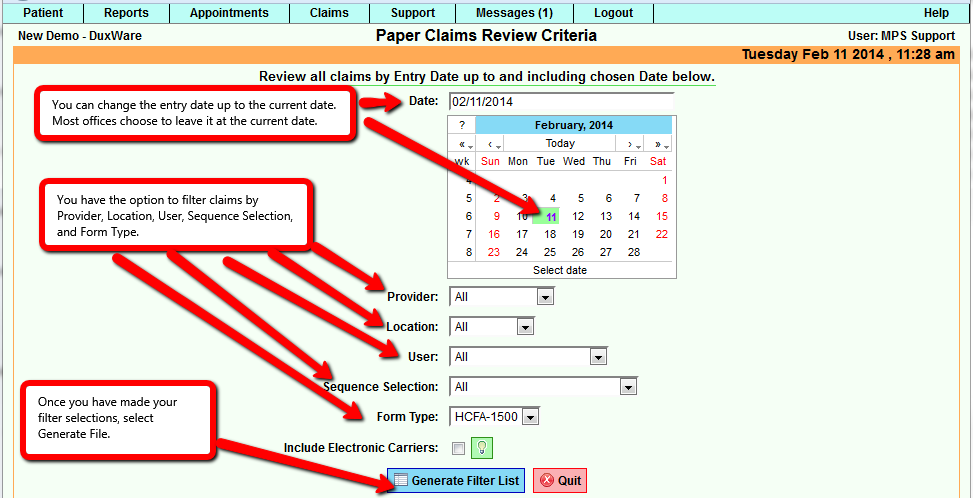
Once you Select Print Claim Forms from the Claim Manager, you will land at the screen below to select your criteria.
Optional Claim Scrub
The optional claim scrub feature via the Alphaii Claim Scrubber has been updated and moved to the Claim Manager section.
